
DIY Halloween Bubbling Cauldron 🧙♀️
Calling all witches and wizards! 🎃🧙♀️ You’ve probably seen the viral bubbling cauldron from TJ Maxx and thought, “I need that in my life!” But let’s be real—sometimes we want the magic without the hefty price tag. So, I decided to channel my inner sorceress and create my own bubbling cauldron using some inexpensive supplies and a dash of DIY magic. The result? An absolutely enchanting Halloween centerpiece that’s perfect for spicing up your spooky season! 🍬🕸️
Why You’ll Love This DIY Cauldron
First things first, why should you jump on this DIY cauldron train? Here’s why:
Cost-Effective Magic: Why spend a fortune when you can create a spellbinding piece with a few budget-friendly supplies? My version of the bubbling cauldron cost a fraction of the price of the store-bought version.
Customizable: You get to decide how big or small your cauldron will be, and you can tailor the decorations to fit your Halloween theme perfectly.
Fun to Create: Crafting this cauldron is an absolute blast. It’s the perfect project to do with friends, kids, or even just on a cozy afternoon by yourself.
What You’ll Need - Click The Links To Shop!
Let’s dive into the magical ingredients you’ll need to conjure up your bubbling cauldron:
3 Different Sizes of Plastic Cauldrons: These will be the base of your cauldron tower.
Packing Paper: This will fill the cauldrons and create that bubbling effect.
Plastic Ornaments: These add a fun, mystical touch.
Decorative Disco Balls: Remove the hooks, and they become dazzling fillers that reflect the light beautifully.
Fairy Lights: To add that magical glow and make your cauldron truly enchanting.
Hot Glue Gun: The magic wand that will hold everything together!

How to Create Your Bubbling Cauldron
Ready to bring your bubbling cauldron to life? Here’s a step-by-step guide to creating this Halloween masterpiece:
1. Prepare Your Cauldrons
Start by gathering your plastic cauldrons. You’ll need three different sizes to create a tiered effect. The largest cauldron will be the base, so let’s begin with that one.
Take 2-3 sheets of packing paper (or newspaper) and crumple them up loosely. This will serve as the “bubbles” inside the cauldron, giving your creation that frothy, bubbling look. Place the packing paper inside the largest cauldron, filling it up almost to the top.
2. Attach the Ornaments and Disco Balls
Using your hot glue gun, carefully apply glue to half of the edge of the largest cauldron. This is where you’ll attach your plastic ornaments and disco balls. Arrange them in a whimsical pattern—mixing and matching sizes and colors to create a fun, bubbly effect. These will act as the base for your next smaller cauldron.
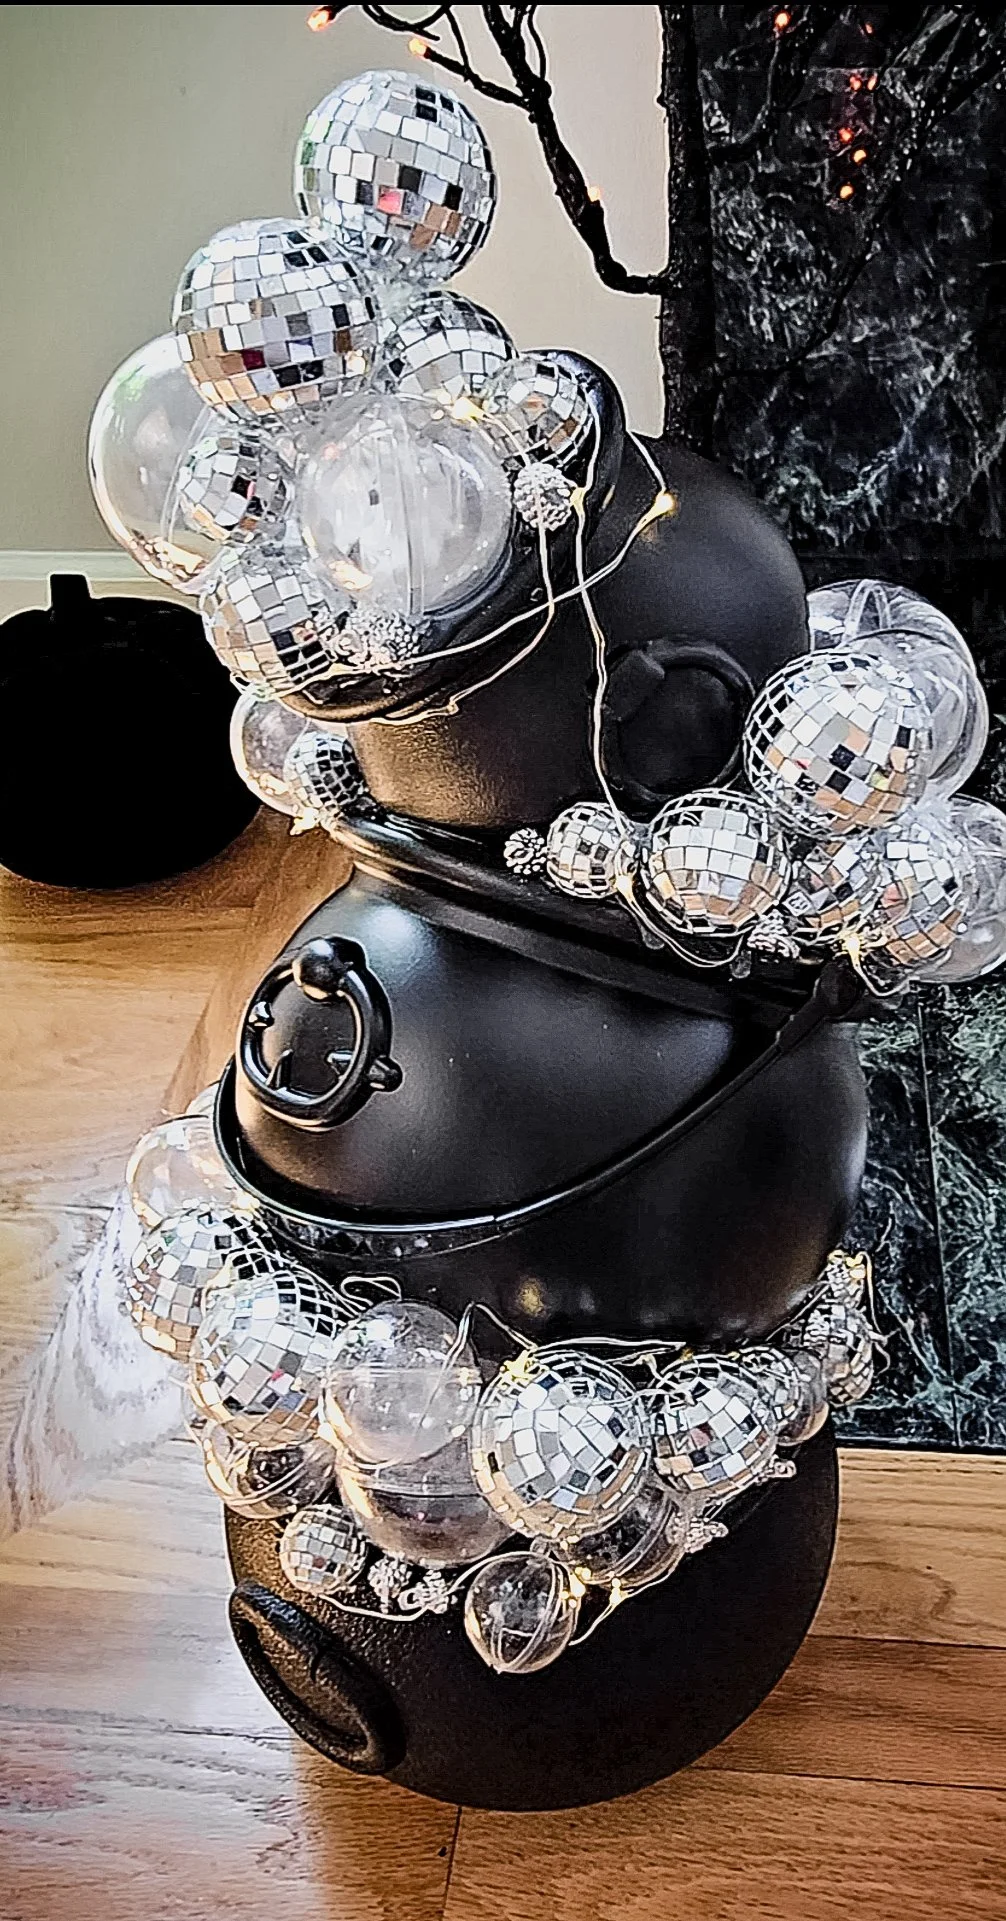
3. Stack the Cauldrons
Now it’s time to build your cauldron tower. Take the next smaller size cauldron and use hot glue to attach it to the free edge of the largest cauldron. Tilt it slightly so that one side rests on the “bubbles” created by the ornaments and disco balls. This creates a layered, bubbling effect that looks like your cauldron is truly brewing something magical!
Repeat this step with the smallest cauldron. Attach it to the edge of the middle cauldron, making sure it’s slightly tilted and resting on the “bubbles” below. You’ll end up with a delightful tiered effect that looks like your cauldrons are bubbling over with enchantment.
4. Wrap with Fairy Lights
For the finishing touch, take your fairy lights and wrap them around the cauldron stack. Drape the lights in and around the “bubbles” to enhance the magical glow. The lights will twinkle and shimmer, adding a mesmerizing effect to your Halloween centerpiece.
If you notice any small gaps or spaces that need filling, you can use the hooks from the disco balls or additional plastic ornaments to cover them.
Final Touches
And voilà! Your DIY bubbling cauldron is complete and ready to impress your guests. Set it up on your dining table, mantel, or entryway for an eye-catching Halloween decoration. You can even add some spooky candies or Halloween treats inside the cauldrons for an extra touch of magic.
Tips for Success
Work in a Well-Ventilated Area: Hot glue guns can get quite hot, so make sure you're working in a space with good ventilation.
Use a Hot Glue Gun with a Stand: This will make it easier to work with and prevent accidental burns.
Plan Your Design: Before gluing everything down, arrange the ornaments and disco balls to get a feel for the design.
Troubleshooting Tips
If the Cauldrons Aren’t Sticking: Make sure you’re using enough hot glue and giving it time to set. If the glue is too cold, it might not hold as well.
If the Packing Paper Isn’t Staying in Place: Try using a bit more glue to secure the paper inside the cauldron or add more paper for a snug fit.
Variations
Glow-in-the-Dark Paint: Paint the cauldrons with glow-in-the-dark paint for an extra eerie effect.
Add Spooky Figures: Place small Halloween figurines, like witches or ghosts, inside the cauldrons for added spookiness.
Use LED Lights: Swap fairy lights for LED lights for a brighter, more vibrant glow.
Storing and Reusing
If you want to reuse the cauldron, disassemble it carefully and store the pieces in a dry, cool place.
More Decorating Ideas
Add Spider Webs: Stretch some faux spider webs around the cauldron for a creepy effect.
Incorporate Fake Bubbles: Use bubble wrap or cotton balls for an added bubbling effect.
Fun Trivia
Did you know that cauldrons have been associated with witches and magic for centuries? They were believed to be a symbol of transformation and mystery. This DIY bubbling cauldron adds a modern twist to this age-old symbol, bringing a bit of enchantment to your Halloween celebrations!
Final words..
I hope you have a blast creating your own bubbling cauldron and that it adds a magical touch to your Halloween festivities! If you have any questions or need more DIY inspiration, drop a comment or message me. Happy crafting, and may your Halloween be spellbinding! 🧙♀️
Recommended Products - Click The Images To Shop!


