
DIY Tomato Cage Disco Ghost: A Spooky and Sparkling Halloween
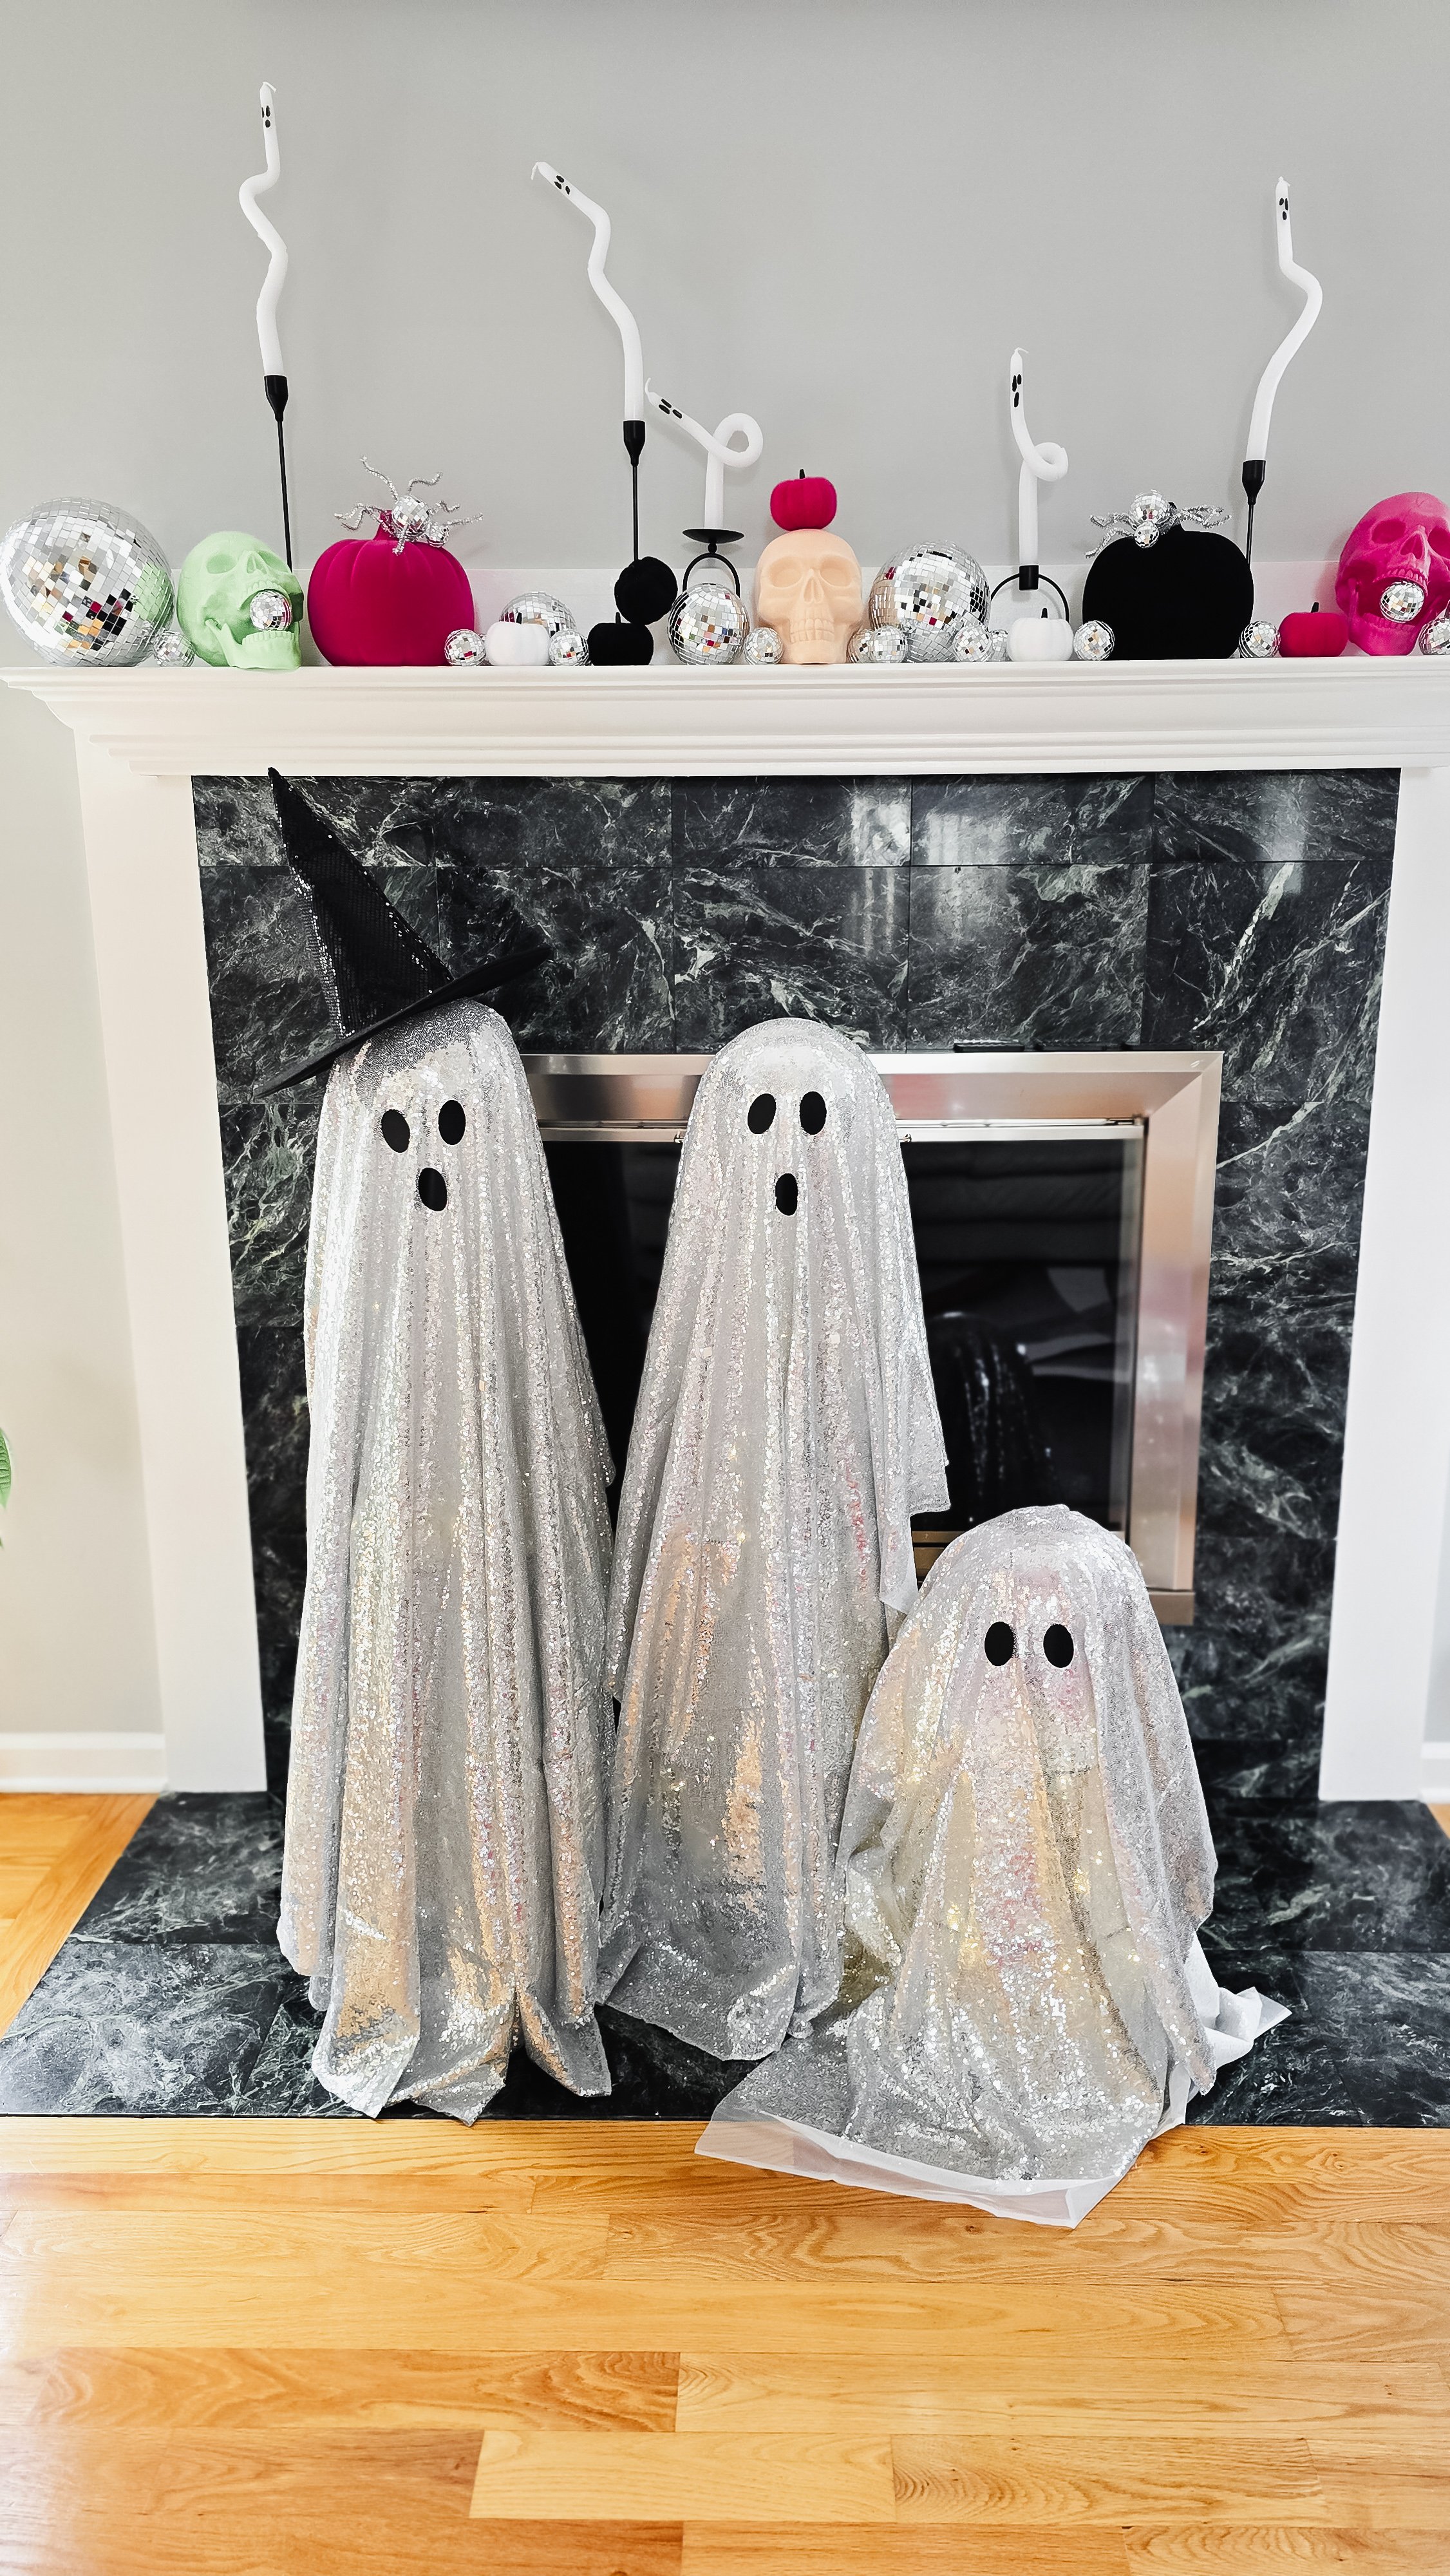
If you’re as obsessed with Halloween decor as I am, you’re in for a treat today! I’m beyond thrilled to share my latest DIY creation with you—a Disco Ghost made from a tomato cage! 🎉👻 Consider this sparkling ghost as the perfect backdrop for your upcoming Halloween desserts or just a fun addition to your home decor. It’s easy to make and adds that extra touch of spook-tacular pizzazz! 💫
I’ve been bubbling with excitement over the new disco Halloween collections, and trust me, this tomato cage ghost “upgrade” was a must-do. I’ve been waiting to share these adorable cuties with you for a while now, and the moment has finally arrived! Ready to add a little disco magic to your Halloween? Let’s get started!
Why You’ll Love This DIY Disco Ghost
Eye-Catching Decor: This Disco Ghost is sure to be the star of your Halloween decor, catching every light and twirling in the most whimsical way.
Simple Steps: With just a few materials and easy steps, you’ll have a fun and festive decoration without spending hours on crafting.
Versatile Fun: Perfect for outdoor setups, as a centerpiece for your Halloween party, or even as a charming addition to your front porch.
Unique and Customizable: Tailor your ghost’s look to match your Halloween theme. Choose different colored sequins or accessories to create a ghost that’s uniquely yours.
Festive and Fabulous: This Disco Ghost will add a sparkle and fun to your Halloween celebrations, making it an eye-catching piece of decor.
What You’ll Need
To create your Disco Ghost, you’ll need the following (click to shop!):
Tomato Cage: The base structure for your ghost.
Styrofoam Ball: For the ghost’s head.
Fairy Light String: To add a magical, sparkling effect.
Cheesecloth: To give your ghost its ghostly appearance.
Sequins Fabric: For that extra disco shimmer.
Eyes and Mouth Stickers: To bring your ghost to life with a cute, spooky face.
Hat and Pumpkin: For a festive touch (I used double-sided tape to attach these).
Double-Sided Tape: To secure the hat and pumpkin.

How to Make Your Disco Ghost
Step 1: Prepare the Tomato Cage
Start by taking your tomato cage and gently sliding the top wires into the styrofoam ball. No need for any extra glue or tying—just slide them in until they’re securely positioned. This will create the base of your ghost’s head and make sure everything stays in place.
Step 2: Wrap with Fairy Lights
Now for the fun part—adding some sparkle! Wrap the tomato cage with a string of fairy lights. This will give your ghost a magical glow and make it shimmer in the night. You can use battery-operated fairy lights to keep things simple and avoid tangled cords.
Step 3: Dress Up Your Ghost
Cover the entire tomato cage and styrofoam ball with cheesecloth. For added shimmer and disco effect, layer on the sequins fabric. You can use two or more layers of cheesecloth and sequins, depending on how dramatic you want your ghost to look. Make sure to drape and adjust the fabric so it falls nicely, giving your ghost that ethereal, floating effect.
Step 4: Add the Face and Accessories
To give your ghost some personality, apply the eyes and mouth stickers. This step is where your ghost really comes to life! Next, attach the hat and pumpkin using double-sided tape. I chose a fun little hat and a mini pumpkin to add a festive touch, but feel free to get creative with your accessories!
Tips for Success
Secure the Lights: Make sure the fairy lights are wrapped tightly and securely to avoid any sagging. You want your ghost to glow evenly.
Adjust the Fabric: Play around with the cheesecloth and sequins to get the right look. Don’t be afraid to adjust and fluff until it’s perfect.
Stick with Double-Sided Tape: Use high-quality double-sided tape for the hat and pumpkin to ensure they stay put and don’t fall off.
Troubleshooting Tips
Lights Not Showing Up: If your fairy lights seem dim or not bright enough, check the batteries or connections. Sometimes a quick fix can make a huge difference.
Fabric Slipping: If the cheesecloth or sequins fabric slips or shifts, use more double-sided tape to secure the layers in place.
Variations
Colorful Disco Ghost: Experiment with different colors of sequins and fabric to match your Halloween color scheme.
Mini Disco Ghosts: Create smaller versions of this disco ghost to use as table centerpieces or as part of a Halloween garland.
Themed Accessories: Customize the hat and pumpkin with Halloween-themed accessories like spider webs, ghosts, or witches’ hats.
More Decorating Ideas
Spooky Surroundings: Place your Disco Ghost amidst a spooky Halloween scene with cobwebs, skeletons, and glowing pumpkins.
Outdoor Display: Use this ghost as part of your outdoor Halloween decorations. It’ll look fabulous glowing under the night sky!
Ghost Family: Make a family of disco ghosts in various sizes for a fun and festive display.
Best Use For
Halloween Desserts: Use this Disco Ghost as a backdrop for your Halloween treats—think cupcakes, cookies, and candy displays.
Spooky Drinks: Serve Halloween-themed cocktails or mocktails in front of your Disco Ghost for a complete spooky experience.
Haunted House: Integrate this ghost into your haunted house setup for an added touch of glam and spookiness.
Fun Trivia
Did you know? Disco balls were first introduced in the 1920s as a form of lighting for dance floors, and they’ve since become a symbol of fun and celebration. Now, they’re making a dazzling comeback in Halloween decor, adding a touch of sparkle and groove to our ghostly festivities!
Final Words
I hope you have as much fun making this DIY Tomato Cage Disco Ghost as I did! It’s a fantastic way to add some sparkle and excitement to your Halloween decor. If you give it a try, don’t forget to comment DISCO, and I’ll send you the links to all the goodies I used! Happy crafting and spooky decorating! 🎃👻
Recommended Products - Click Image to Shop!


